ASTM D2500-17a
Standard Test Method for Cloud Point of Petroleum Products and Liquid Fuels
Standard test method D2500 covers in any petroleum product the determination of the Cloud Point. The cloud point testing procedure formerly part of this test method now appears as Test Method D2500.
Several ASTM test methods offering alternative procedures for determining pour points using automatic apparatus are available. None of them share the same designation number as Test Method D97. When an automatic instrument is used, the ASTM test method designation number specific to the technique shall be reported with the results. A procedure for testing the pour point of crude oils is described in Test Method D5853.
This international standard was developed in accordance with internationally recognized principles on standardization established in the Decision on Principles for the Development of International Standards, Guides and Recommendations issued by the World Trade Organization Technical Barriers to Trade (TBT) Committee.
Crystals of sufficient dimensions and quantities can plug filters used in fuel systems and other parts of machinery and also cause operational problems in crude oil and petroleum products blending operations. A precise and reliable determination of these properties and of the ability of petroleum oils and other products to flow freely constitutes a valuable tool not only to more precisely determine the specifications of new oils but also to monitor important handling, transport and processing operations.
Referenced Documents
ASTM Standards:
D1500 Test Method for ASTM Color of Petroleum Products (ASTM Color Scale)
D6300 Practice for Determination of Precision and Bias Data for Use in Test Methods for Petroleum Products and Lubricants
D7962 Practice for Determination of Minimum Immersion Depth and Assessment of Temperature Sensor Measurement Drift
E1 Specifications for ASTM Liquid-in-Glass Thermometers
E644 Test Method for Testing Industrial Resistance Thermometers
E2251 Specifications for Liquid-in-Glass ASTM Thermometers with Low-Hazard Precision Liquids
E2877 Guide for Digital Contact Thermometers
Summary of Test Method
After preliminary heating, the sample is cooled at a specified rate and examined at intervals of 3°C for flow characteristics. The lowest temperature at which movement of the specimen is observed is recorded as the pour point.
Significance and Use
For petroleum products and biodiesel fuels, cloud point of a petroleum product is an index of the lowest temperature at which wax crystals begin to precipitate and can create fuel flow blockage through filters, fuel lines and other restricted passages of the fuel system. As the Cloud Point goes up, the suitability of the fuel for low-temperature operations decreases.
Apparatus
Test Jar_ cylindrical, of clear glass, flat bottom, 33.2 to 34.8-mm outside diameter, and 115 to 125 mm in height. The inside diameter of the jar can range from 30.0 to 32.4 mm, within the constraint that the wall thickness be no greater than 1.6 mm. The jar shall have a line to indicate a sample height 54 ± 3 mm above the inside bottom. See Fig. 1.
Thermometers_ having the following ranges and conforming to the requirements prescribed in Specification E 1 for thermometers:
| Temperature | Thermometer Number | ||
| Thermometer | Range | ASTM | IP |
| High cloud and pour | −38 to +50°C | 5C | 1C |
| Low cloud and pour | −80 to +20°C | 6C | 2C |
| Melting point | +20 to +127°C | 61C | 63C |
Since separation of liquid column thermometers occasionally occurs and may escape detection, thermometers should be checked immediately prior to the test and used only if they prove accurate within 61°C (for example ice point).
Cork_ to fit the test jar, bored centrally for the test thermometer.
Jacket_ watertight, cylindrical, metal, flat-bottomed, 115 6 3-mm depth, with inside diameter of 44.2 to 45.8 mm. It shall be supported in a vertical position in the cooling bath (see description of baths below) so that not more than 25 mm projects out of the cooling medium, and shall be capable of being cleaned.
Disk, cork or felt_ 6 mm thick to fit loosely inside the jacket.
Gasket_ to fit snugly around the outside of the test jar and loosely inside the jacket. The gasket may be made of rubber, leather, or other material that is elastic enough to cling to the test jar and hard enough to hold its shape. Its purpose is to prevent the test jar from touching the jacket.
Baths_ maintained at prescribed temperatures with a firm support to hold the jacket vertical. The required bath temperatures may be obtained by refrigeration if available, otherwise by suitable freezing mixtures. Freezing mixtures commonly used for temperatures down to those shown are as follows:
For Temperatures Down
Ice and water 9°C
Crushed ice and sodium chloride crystals −12°C
Crushed ice and calcium chloride crystals −27°C
Acetone or petroleum naphtha
(see Section on Reagents and Materials D97)
chilled in a covered metal beaker with an ice-salt
mixture to −12°C then with enough solid carbon dioxide
to give the desired temperature. −57°C
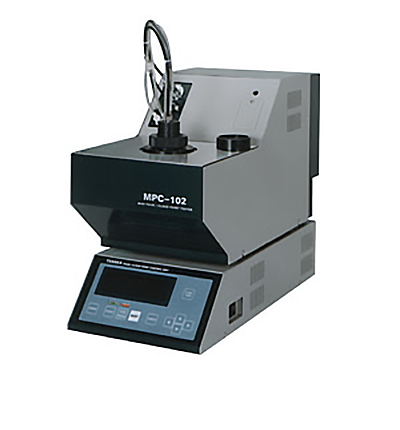
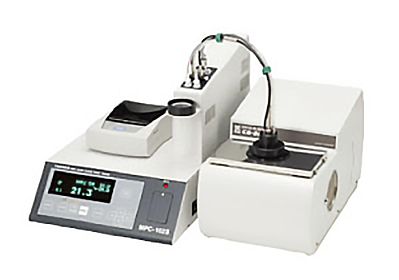
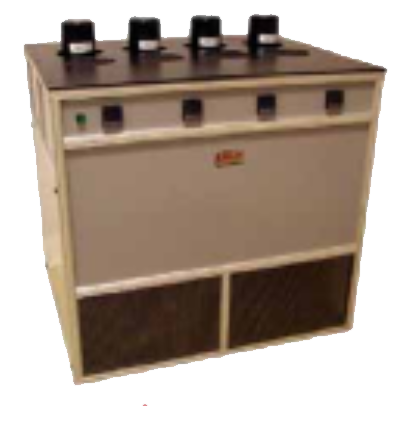
There are many manufacturers of these cold properties instruments in many cases combined with cloud point D2500, D7689, Pour Point of Crude Oils D5853 among others. Figure 2 below shows a combination of these instruments from Tanaka and Nordexp manufacturers.
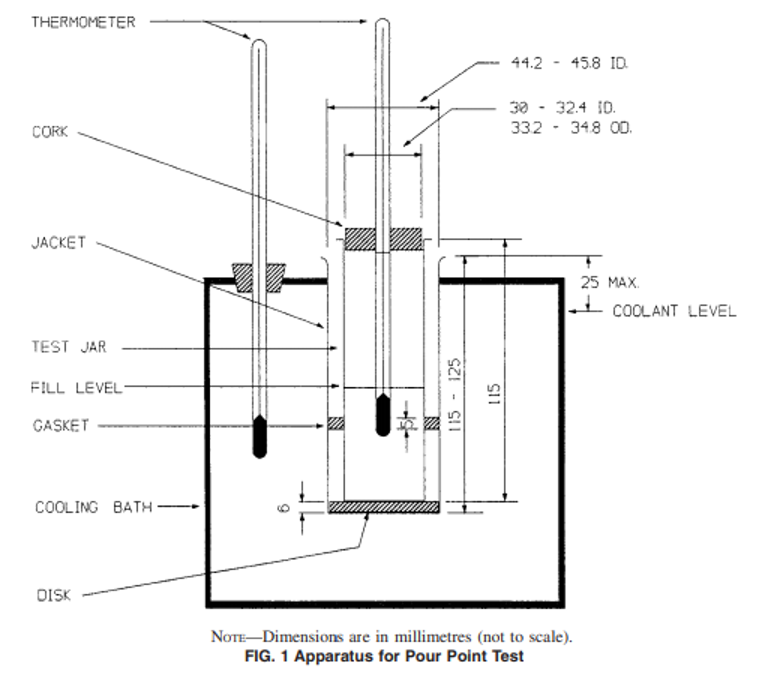
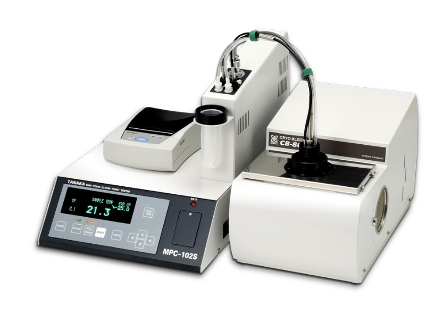
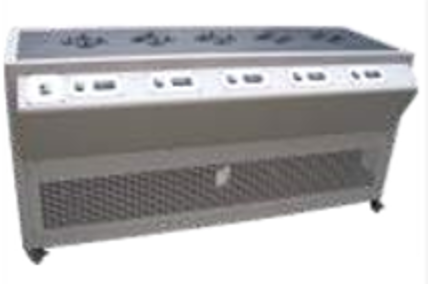
Figure 2. Typical Apparatus for D97, D2500, D7689 and D5853 for Cloud Point and Pour Point testing
Reagents and Materials
The following solvents of technical grade are appropriate for low-temperature bath media.
Acetone- (Warning—Extremely flammable).
Alcohol, Ethanol- (Warning—Flammable).
Alcohol, Methanol- (Warning—Flammable. Vapor harmful).
Petroleum Naphtha- (Warning—Combustible. Vapor harmful).
Solid Carbon Dioxide- (Warning—Extremely cold −78.5°C).
Test Procedure
Pour the specimen into the test jar to the level mark. When necessary, heat the specimen in a water bath until it is just sufficiently fluid to pour into the test jar.
NOTE 1—It is known that some materials, when heated to a temperature higher than 45°C during the preceding 24 h, do not yield the same pour point results as when they are kept at room temperature for 24 h prior to testing. Examples of materials which are known to show sensitivity to thermal history are residual fuels, black oils, and cylinder stocks.
Samples of residual fuels, black oils, and cylinder stocks which have been heated to a temperature higher than 45°C during the preceding 24 h, or when the thermal history of these sample types is not known, shall be kept at room temperature for 24 h before testing. Samples which are known by the operator not to be sensitive to thermal history need not be kept at room temperature for 24 h before testing.
Experimental evidence supporting elimination of the 24-h waiting period for some sample types is contained in a research report RR: D02-1377.
Close the test jar with the cork carrying the high-pour thermometer (5.2). In the case of pour points above 36°C, use a higher range thermometer such as IP 63C or ASTM 61C. Adjust the position of the cork and thermometer so the cork fits tightly, the thermometer and the jar are coaxial, and the thermometer bulb is immersed so the beginning of the capillary is 3 mm below the surface of the specimen.
For the measurement of pour point, subject the specimen in the test jar to the following preliminary treatment:
Specimens Having Pour Points Above −33°C—Heat the specimen without stirring to 9°C above the expected pour point, but to at least 45°C, in a bath maintained at 12°C above the expected pour point, but at least 48°C. Transfer the test jar to a water bath maintained at 24°C and commence observations for pour point.
Specimens Having Pour Points of −33°C and Below—Heat the specimen without stirring to 45°C in a bath maintained at 48°C and cool to 15°C in a water bath maintained at 6°C. Remove the high cloud and pour thermometer, and place the low cloud and pour thermometer in position.
See that the disk, gasket, and the inside of the jacket are clean and dry. Place the disk in the bottom of the jacket. Place the gasket around the test jar, 25 mm from the bottom. Insert the test jar in the jacket. Never place a jar directly into the cooling medium.
After the specimen has cooled to allow the formation of paraffin wax crystals, take great care not to disturb the mass of specimen nor permit the thermometer to shift in the specimen; any disturbance of the spongy network of wax crystals will lead to low and erroneous results.
Pour points are expressed in integers that are positive or negative multiples of 3°C. Begin to examine the appearance of the specimen when the temperature of the specimen is 9°C above the expected pour point (estimated as a multiple of 3°C). At each test thermometer reading that is a multiple of 3°C below the starting temperature remove the test jar from the jacket. To remove condensed moisture that limits visibility wipe the surface with a clean cloth moistened in alcohol (ethanol or methanol). Tilt the jar just enough to ascertain whether there is a movement of the specimen in the test jar. The complete operation of removal, wiping, and replacement shall require not more than 3 s.
If the specimen has not ceased to flow when its temperature has reached 27°C, transfer the test jar to the next lower temperature bath in accordance with the following schedule:
Specimen is at +27°C, move to 0°C bath
Specimen is at +9°C, move to −18°C bath
Specimen is at −6°C, move to −33°C bath
Specimen is at −24°C, move to −51°C bath
Specimen is at −42°C, move to −69°C bath
As soon as the specimen in the jar does not flow when tilted, hold the jar in a horizontal position for 5 s, as noted by an accurate timing device and observe carefully. If the specimen shows any movement, replace the test jar immediately in the jacket and repeat a test for flow at the next temperature, 3°C lower.
Continue in this manner until a point is reached at which the specimen shows no movement when the test jar is held in a horizontal position for 5 s. Record the observed reading of the test thermometer. 8.8 For black specimen, cylinder stock, and nondistillate fuel specimen, the result obtained by the procedure described above is the upper (maximum) pour point. If required, determine the lower (minimum) pour point by heating the sample while stirring, to 105°C, pouring it into the jar, and determining the pour point as described in this section
Some specifications allow for a pass/fail test or have pour point limits at temperatures not divisible by 3°C. In these cases, it is acceptable practice to conduct the pour point measurement according to the following schedule: Begin to examine the appearance of the specimen when the temperature of the specimen is 9°C above the specification pour point. Continue observations at 3°C intervals as described previously until the specification temperature is reached. Report the sample as passing or failing the specification limit.
Calculations and Report
Add 3°C to the temperature recorded in 8.7 and report the result as the Pour Point, ASTM D 97. For black oil, and so forth, add 3°C to the temperature recorded in 8.7 and report the result as Upper Pour Point, ASTM D 97, or Lower Pour Point, ASTM D 97, as required.
Precision and Bias
Lubricating Oil and Distillate and Residual Fuel Oil. Cloud Point once part of this methods appears now as separate test method D2500.
Repeatability—The difference between successive test results, obtained by the same operator using the same apparatus under constant operating conditions on identical test material, would in the long run, in the normal and correct operation of this test method, exceed 3°C only in one case in twenty. Differences greater than this should be considered suspect.
Reproducibility—The difference between two single and independent test results, obtained by different operators working in different laboratories on identical test material, would in the long run, in the normal and correct operation of this test method, exceed 6°C only in one case in twenty. Differences greater than this should be considered suspect.
Bias—There being no criteria for measuring bias in these test-product combinations, no statement of bias can be made.
The precision statements were prepared with data on ten new (unused) mineral oil-based lubricants and sixteen assorted fuel oils tested by twelve cooperators. The mineral oil-based lubricants had pour points ranging from −48 to −6°C while the fuel oils had pour points ranging from −33 to +51°C.
The following precision data were obtained:
Mineral Oil Lubricants Fuel Oils
95 % Confidence
Repeatability, °C 2.87 2.52
Reproducibility, °C 6.43 6.59
